
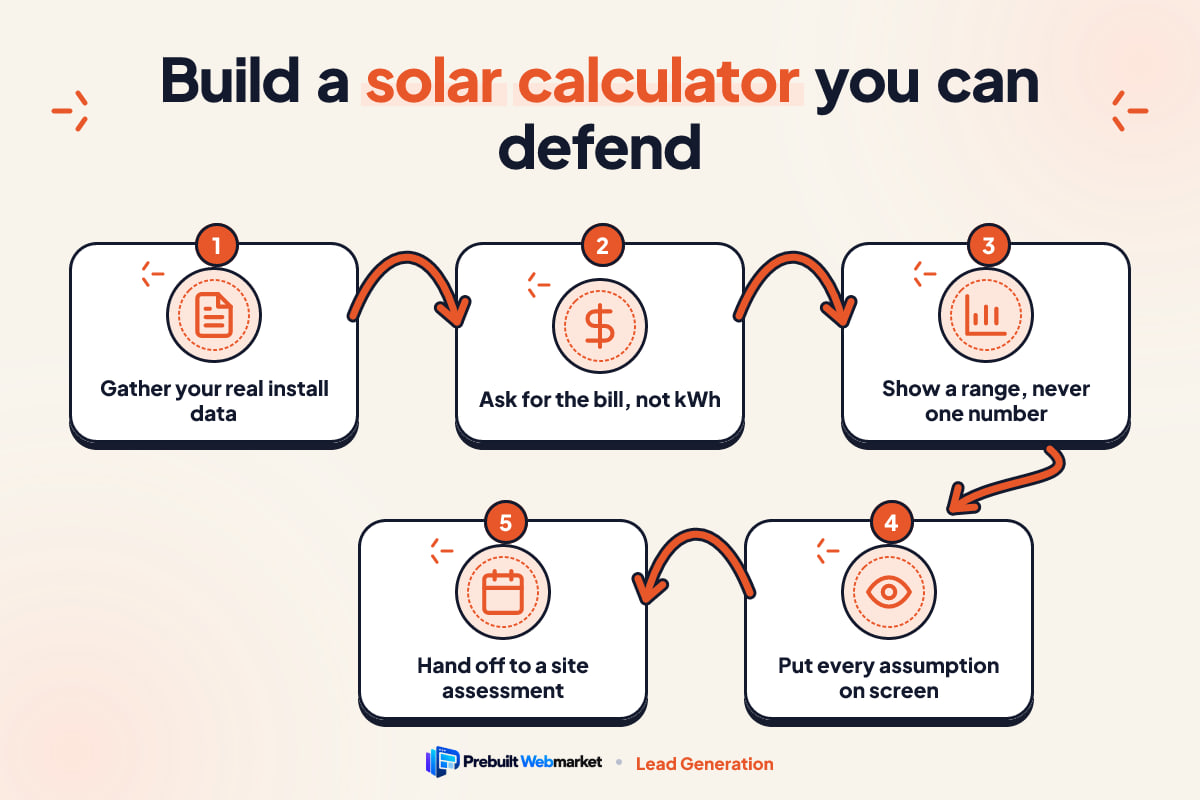
Quick answer
Build your solar savings calculator around the homeowner's monthly bill and address, model production with a recognised tool such as NREL's PVWatts, value used and exported power separately, and show a savings range with every assumption written beside it. Make the next step a site assessment, because only a person on the roof can turn the range into a figure you put in writing.
Key takeaways
- Decide the one question the calculator answers before you choose any inputs: usually "roughly how much could solar take off my power bill?"
- Ask for the monthly bill and the address. Most homeowners do not know their kWh use, roof azimuth or shading percentage.
- Value power used at home and power sent to the grid at different rates, and keep the fixed monthly charge in the bill.
- Show a low and a high case, never one figure, and set the low case from your own worst installed jobs.
- Print the assumptions on the results screen in plain words: rate, export credit, rate rise, shade and system size.
- Test the calculator against ten systems you have already installed before it goes live, and review it whenever rates change.
In this article
- What a solar savings calculator on your website must achieve
- Before you start: what to gather
- Step 1: Decide the one question it answers
- Step 2: Choose inputs the homeowner actually knows
- Step 3: Write down the maths before any design
- Step 4: Show a range, never one figure
- Step 5: Put the assumptions on the results screen
- Step 6: Build the screens for a phone
- Step 7: Hand off to a site assessment
- How to test it before it goes live
- What to measure after launch
- Where the usual advice is the wrong answer
- Putting it on your solar energy website
- Frequently asked questions
A solar savings calculator website tool should take two things a homeowner actually knows, their monthly bill and their address, and return a savings range with its assumptions printed beside it. Its job is to start an honest conversation and book a site assessment, not to quote a figure you will later have to explain away.
That distinction matters more in solar than in almost any other trade. The sale is built on a forecast. A homeowner signs because of what the system is expected to save over years, and they check that forecast every month when the bill arrives. If the calculator on your website promised $180 a month and the first bill drops by $90, you do not have a happy customer with a slightly smaller saving. You have a customer who believes they were misled, and they will say so in a review.
What a solar savings calculator on your website must achieve
A solar savings calculator on your website must do three things: give a curious homeowner a believable answer in under a minute, set expectations your installed systems will meet, and turn the interested ones into booked site assessments. If it does the first and fails the second, it is a complaint generator. If it does the second and fails the first, nobody finishes it.
It helps to be clear about what it is not. It is not a proposal. It is not a design tool. It does not size the system, pick the panels or work out the financing. Those come later, from a person who has seen the roof, the meter box and a year of bills. The calculator sits right at the start of a long buying process, usually before the homeowner has spoken to anyone, and its single output is a range that answers “is this worth a conversation?”
When you build it with that narrow purpose, every later decision gets easier. Should it ask for the roof pitch? No, the assessment will measure it. Should it show twenty-five-year savings to the dollar? No, that is a proposal figure. Should it show a payback period? Possibly, as a range, if you can defend both ends. The test for every input and every output is the same: would you be comfortable reading this aloud to the customer at the kitchen table a year after the install?
Before you start: what to gather
The material you need before building is mostly your own records, not software. A calculator is only as honest as the numbers behind it, and the best source of those numbers is the systems you have already put on roofs in your area.
Your installed jobs
Pull together ten to twenty recent residential installs with at least a year of production data. For each one, note the system size, the main roof direction, roughly how shaded it was, the expected yearly production you quoted and what it actually produced. Note what the household’s bills did too, if they shared them. This is the data you will test the calculator against later, and it will tell you how wide the range needs to be.
Your local rates and export rules
Write down how each utility in your service area bills homes: the price per kWh, any tiers or time-of-use periods, the fixed monthly charge and how exported power is credited. NREL’s open-source SAM Simulation Core, which sits behind its modelling tools, lists the metering options a savings model has to choose between: net energy metering, net metering with dollar credits, net billing, net billing with monthly carryover, and “buy all, sell all”. The same file treats the monthly fixed charge and the yearly rate escalation as separate inputs. Your calculator needs a decision on each of those for every utility you serve.
Your pricing bands
If the calculator will show a payback period, you need installed price bands per kW that you actually charge, with the range that covers most jobs. If you cannot commit to those publicly, leave payback off and show bill savings only.
A person who owns the leads
Decide who receives each calculator enquiry and how fast they reply. A homeowner who has just seen a range is at their most interested; a callback three days later meets someone who has moved on. If nobody can reply the same day, fix that before building anything, perhaps with automated CRM follow-up for solar leads.
Step 1: Decide the one question it answers
The first decision is which single question the calculator answers, because the inputs, the maths and the result screen all follow from it. For most residential installers the right question is “roughly how much could solar take off my monthly power bill?”
There are other candidates. “How big a system do I need?” is a sizing question and needs roof detail the homeowner does not have. “How long until it pays for itself?” depends on price, financing and incentives, so it multiplies the uncertainty. “How much will I save over twenty-five years?” compounds every assumption over decades and produces large, fragile numbers. Each of these can appear as secondary information, but none of them should be the headline.
Pick the bill question and the result becomes something the homeowner can check against their own bill. That makes the calculator accountable, which is exactly why people believe it.
If your business is mostly batteries and backup power, or commercial and farm systems, the question changes. A backup customer cares about which circuits stay on in an outage, not monthly savings, and a commercial buyer usually wants a proper feasibility study. Build those as separate paths, with their own pages in your solar energy website design, rather than squeezing them into the residential calculator.
Step 2: Choose inputs the homeowner actually knows
The inputs should be things a homeowner can answer from memory or from one look at a bill, and nothing more. Every field you add costs finishers, and every field they guess at makes the result less accurate, not more.
The monthly bill, not kWh
Ask for the average monthly electricity bill in dollars. Most people know it roughly; very few know their yearly kWh use. Let them pick a typical month or type a number, and say “a rough average is fine” under the field. If you want a better figure, offer an optional second step later: “Have a bill handy? Enter your kWh for a tighter estimate.”
You will convert dollars to kWh in the background using the utility’s rate, which is why the next input matters.
The address or ZIP code
The address tells you which utility serves the home and what the sun is like there. A ZIP code is enough for the utility and the weather data; a full street address lets you look at the actual roof later. Ask for whichever you will genuinely use. If you only use the ZIP code, do not collect the street address at this stage.
One question about the roof
Ask which way the main roof slope faces, with plain answers: south, east or west, north, flat, or not sure. Do not ask for azimuth in degrees. NREL’s PVWatts model, whose version 8 inputs are published in NREL’s open-source code, does take azimuth in degrees (east is 90, south 180, west 270), but that is your job to translate, not the homeowner’s.
One question about shade
Ask whether trees or buildings shade the roof for part of the day: no, some, a lot, or not sure. Shade is one of the biggest reasons a real system underperforms a simple estimate, and it is invisible in most quick models. Treat “not sure” as “some” when you calculate, and say so.
What to leave off
Leave off roof pitch, roof age, panel brand, battery preference, financing method, household size and credit questions. Some of these matter for the proposal; none of them improve a first range enough to justify the field. Leave off the phone number at this stage too, and ask for it with the handoff instead.
Step 3: Write down the maths before any design
The maths should be agreed in writing before anyone designs a screen, because most calculator problems are hidden calculation choices, not interface problems. There are five parts, and each needs a stated assumption.
Production
Estimate yearly production per kW for the address using a recognised model rather than a flat national figure. PVWatts is the common choice. Its published inputs include system size in kW, roof direction and tilt, a total system losses percentage, inverter efficiency (defaulting to 96%) and a DC to AC ratio (defaulting to 1.1), plus a weather file for the location and an optional yearly degradation rate for lifetime runs. Run it once per direction and shade band for each area you serve, and store the results; you do not need a live model call for every visitor.
Then compare those modelled figures with the actual production from your installed jobs. If your real systems consistently produce less than the model says, use your own numbers.
Self-use and exports
Split production into the share used in the home as it is generated and the share sent to the grid. Power used at home is worth the full retail rate; exported power is worth whatever the utility credits for it, which under net billing can be far less. This one split is where many calculators overstate savings, because they value every kWh at the retail rate.
The fixed charge
Keep the monthly fixed charge on the bill. A homeowner with a $15 connection charge will never see a $0 bill from solar alone, and the calculator should say so rather than let them assume it.
Rate rises
Decide whether you assume electricity prices will rise. NREL’s own rate model treats escalation as an input with a default of zero. If you assume rises, say what rate you assumed and show the result without them as well. A savings figure that only works with an assumed 5% yearly increase is a figure built on a guess.
Incentives
Keep tax credits, rebates and utility incentives out of the savings range. If you show them, put them on a separate line with the date you last checked them and the conditions that apply.
Step 4: Show a range, never one figure
The result should be a low case and a high case, because a single number implies a precision your calculator cannot have. The range is the honest answer to “it depends”, expressed in dollars.
A worked example
Here is how the maths works for an illustrative home, using assumptions you would replace with your own. The numbers below are an example only, not data about any real customer or utility.
- Average bill: $180 a month, including a $15 fixed charge.
- Retail rate: $0.22 per kWh, so the energy part of the bill ($165) is about 750 kWh a month, or 9,000 kWh a year.
- Suggested system: 6 kW.
- Export credit: $0.08 per kWh.
High case (no shade, good roof, 1,500 kWh per kW per year from your own modelled runs, 65% used at home): 9,000 kWh produced. 5,850 kWh used at home is worth $1,287; 3,150 kWh exported is worth $252. Total: $1,539 a year, about $128 a month.
Low case (some shade, 1,250 kWh per kW per year, 50% used at home): 7,500 kWh produced. 3,750 kWh used at home is worth $825; 3,750 kWh exported is worth $300. Total: $1,125 a year, about $94 a month.
So the result reads: “Estimated bill saving: about $95 to $130 a month. Your $15 fixed charge stays.” That is a long way from “Save $180 a month!”, and it is the version your installed systems can meet.
How wide the range should be
Set the low case from your own worst-performing installs, not from the model’s pessimistic setting. If one in five of your recent systems produced 15% less than quoted, the low case should cover that. If the range comes out embarrassingly wide for some inputs, such as a north-facing roof with heavy shade, say plainly that solar may not suit the roof and offer the assessment anyway.
Step 5: Put the assumptions on the results screen
The assumptions belong on the results screen itself, in plain words, because a range without its assumptions still reads as a promise. Hiding them behind a link labelled “methodology” protects nobody.
What the panel should list
Directly under the range, list:
- The electricity rate used and which utility it came from.
- How exported power is credited in the estimate.
- Whether a rate rise is assumed, and how much.
- The shade and roof direction answers the estimate used.
- The system size the estimate assumes.
- That incentives are not included (or which ones are, and when they were checked).
- The date the calculator was last reviewed.
Write each as a short sentence: “We assumed your utility credits exported power at 8 cents per kWh.” Then add one line that sets up the next step: “A site assessment checks your roof, shade and bills to replace this range with a written figure.”
Let them change an answer
If a homeowner realises they picked the wrong roof direction, let them change that one answer from the results screen and see the range update. The GOV.UK Design System’s check answers pattern recommends a “Change” link beside each answer and keeping what users already entered, so they never have to start again. The same idea works here.
Step 6: Build the screens for a phone
The calculator should be built for a phone first, because that is where many homeowners will open it, often while looking at a bill or standing in the yard. Three details make the biggest difference.
The right keyboard
For the bill field, use inputmode="decimal" so phones show a number pad with a decimal point. MDN’s documentation for the inputmode attribute explains that it only hints at which virtual keyboard to show and does not validate anything, so you still need to check the value. Accept “180”, “$180” and “180.50” without throwing an error.
One question per screen, or one short screen
Four inputs fit comfortably on one phone screen. If you add the optional kWh step, put it after the first result rather than before it. Use large tap targets for the roof and shade answers rather than drop-down menus.
Announce the result
When the range appears without the page reloading, screen reader users need to hear it. W3C’s guidance on status messages covers exactly this case: content that appears as the result of an action, without taking focus, should be marked so assistive technology announces it. Mark the whole sentence, “Estimated bill saving: about $95 to $130 a month”, not just the changing numbers, so it makes sense when read on its own.
Keep the calculator light: a heavy script slows the page for every visitor, and a results screen of text and numbers needs no charting library.
Step 7: Hand off to a site assessment
The handoff should invite the homeowner to book a site assessment that replaces the range with a written figure, because that is the only honest next step a calculator can offer. Put it directly under the assumptions panel, not in a pop-up.
What to ask for
Now ask for a name, a phone number or email, and a preferred time to talk. Carry over everything they already entered, the bill, address, roof and shade answers, so your team does not ask again. Offer an optional upload for a recent bill, since it lets your designer prepare before the call. The Brightpath Solar demo from Fresno, California, builds its offer around a free bill review on a solar website, which is a natural follow-on from a calculator range.
What the confirmation should say
After they submit, confirm in words what happens next and when: “Thanks, we will call you within one business day to arrange a time to look at your roof. Your estimate of $95 to $130 a month is saved and we will bring it with us.” Then send the same summary by email.
How fast to follow up
Reply the same day where you can. Solar buying cycles are long, and a homeowner who used your calculator may also be talking to two other installers. Automated text and email follow-up can carry the conversation through the weeks of thinking that usually follow, so the lead does not go cold while they decide.
How to test it before it goes live
You test a solar savings calculator by running your own installed jobs through it and checking whether the range would have held. Do this before launch, not after the first complaint.
Run your past installs
Take the ten to twenty jobs you gathered at the start. For each, enter the household’s pre-solar bill, address, roof direction and shade answer, then compare the range with what the system actually saved. Every result should fall inside the range. If two or more fall below the low case, widen the range or lower the production figures, then run the test again.
Try to break it
Enter a $0 bill, a $2,000 bill, a letter instead of a number, a ZIP code outside your service area and a north-facing roof with heavy shade. Each should produce a sensible message, not a crash or an absurd saving, and an out-of-area visitor should be told so politely.
Read it as a homeowner
Ask someone outside the business to use it on their phone and then explain the result back to you. If they say “it will save me $130 a month”, the range is not reading as a range. Rewrite the result line until they repeat it correctly.
Check it with a screen reader
Turn on the phone’s screen reader, fill in the form and listen for the result. If nothing is announced when the range appears, fix the status message before launch.
What to measure after launch
After launch, measure whether the calculator produces booked assessments and signed installs whose results match the range, not how many people press the button. A calculator can be popular and still be bad for the business.
The numbers that matter
Track, month by month:
- How many visitors start the calculator, and how many reach a result.
- How many results turn into assessment requests.
- How many of those assessments turn into signed contracts.
- For installed systems that started in the calculator, whether the first year’s savings landed inside the range shown.
The fourth number tells you whether the calculator is building trust or borrowing it. Set up events in your analytics for the first three, and add a field in your CRM noting the range each customer saw.
Where people drop out
If many start and few reach a result, an input is causing trouble, usually a fussy bill or address field. If many reach a result and few book, the range is not believable or the handoff is buried.
When to review it
Review the calculator whenever a utility changes its rates or export credits, whenever your prices change, and at least once a year. Update the “last reviewed” date on the results screen each time, so homeowners and your sales team can see it is current.
Where the usual advice is the wrong answer
The usual advice for website calculators, collect the email before you show the result and make the number as big as you can, is the wrong answer for solar. Both create short-term leads and long-term problems.
Gating the result behind a form
Gating the result can raise form fills, but solar customers are wary of being chased by salespeople, and many will type a fake number to see the result. Show the range first. The people who then ask for an assessment have seen your honest number and still want to talk.
The single big headline figure
A big single figure, often lifetime savings over twenty-five years, makes an impressive screen and a weak promise. It compounds every assumption across decades and invites the customer to measure you against it. A monthly range they can check against next month’s bill is smaller, and far more persuasive to a careful buyer.
Copying a national calculator
Many installers embed a generic calculator that uses national averages for rates and sunshine. It is quick, but it ignores the export rules and fixed charges of your utilities, which are exactly what decide the saving. A local calculator built on your own installs is more work and much more defensible.
The roofing trade has a similar argument about instant satellite quotes on roofing websites, and the conclusion there carries over: a live number works when it is worded as a range and someone calls it back quickly.
Putting it on your solar energy website
The calculator works best as one part of a solar energy website that answers the same questions in text: what solar costs locally, how your utilities credit exports, and what happens at a site assessment. Put the calculator on the home page and the residential solar page, and write the key assumptions on those pages in plain sentences too, so search engines and AI assistants can read them. Our guide to AI search for solar installers covers how those answer-first pages get quoted, and the Tennessee solar website guide shows how much local utility rules change the savings story.
If you want to see how this looks on a finished website for a solar installer, the Voltaic Energy Systems demo from Raleigh, North Carolina, is built around a solar website with a payback model, and you can browse all four solar installer website demos side by side. Our prebuilt solar energy websites start at $97 a month with a $297 setup fee and launch within 7 business days of receiving your content; the plans and prices page lists what each includes, and the comparison of website options is fair about when a freelancer, agency or DIY builder suits you better.
Your next step is to gather ten installed jobs and your utility rates, then write the one-page assumptions document. If you would like help turning it into a working calculator, book a free 45-minute website call and bring the document with you.
Sources
- NREL SAM Simulation Core: PVWatts version 8 model inputs (cmod_pvwattsv8.cpp)
- NREL SAM Simulation Core: electricity rate and metering inputs (common.cpp)
- W3C WCAG: Understanding Status Messages
- W3C WCAG: Understanding Labels or Instructions
- MDN Web Docs: the inputmode global attribute
- GOV.UK Design System: Check answers pattern
Frequently asked questions
Should a solar savings calculator on my website show a single savings figure?
No. A single figure reads as a promise, and the real result depends on shade, roof direction, how much power the household uses during the day and what the utility pays for exports. Show a low and a high case with the assumptions beside them, then make the site assessment the step that turns the range into a written figure.
What inputs should a solar calculator ask homeowners for?
Start with the average monthly power bill and the home address or ZIP code. Add one plain question about the roof, such as which way the main slope faces, and one about shade, with "not sure" as an answer. Leave kWh use, roof pitch, azimuth in degrees and panel models for the assessment, because most homeowners cannot answer them accurately.
Can I use NREL PVWatts for my website calculator?
PVWatts is a widely used production model from the National Renewable Energy Laboratory, and its code is open source in NREL's SAM Simulation Core. Many installers use it, or a service built on similar models, to estimate yearly output for a location. Check the current terms for any API you call, and remember it estimates production only; the savings maths still depends on your local rates.
Should the calculator include tax credits and rebates?
Keep incentives out of the main savings range and show them as a separate, dated line only when you have confirmed they apply. Federal, state and utility incentives change, and some depend on the buyer's tax position or whether they buy, finance or lease. A savings figure that quietly includes an incentive the customer cannot claim is the kind that turns into a complaint.
Do I need to ask for a phone number before showing the result?
Show the range first, then ask for contact details to book the site assessment or send a written summary. Hiding the number behind a form tends to collect fake details and frustrated visitors. People who have seen an honest range and still want the assessment are better enquiries to call back.
How often should I update the calculator?
Review it whenever your utility changes its rates or export credits, whenever your installed prices move, and at least once a year. Put the date of the last review on the results screen so homeowners and your sales team can see the assumptions are current.
Will a savings calculator get my solar website more leads?
It can bring in homeowners who are curious about cost but not ready to book a consultation, and some of them will go on to book. Nobody can promise a number of extra installs from the tool alone. Track booked assessments and signed contracts that started in the calculator, not just form fills, and judge it on those.